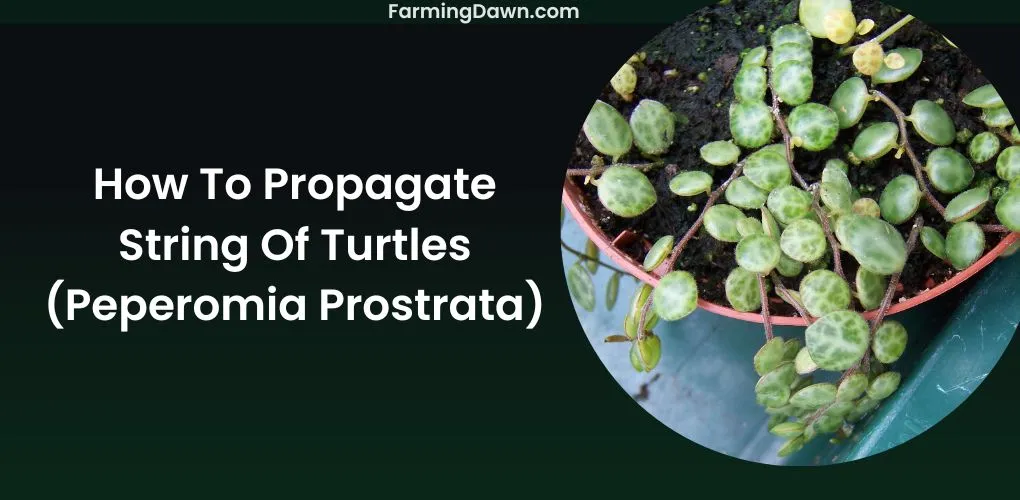
Propagating string of turtles is a great way to bring some life into your home while connecting with the natural world around us – after all, we all have an inherent desire for belonging, right?
So, today I’m gonna tell you how to propagate string of turtles. It’s pretty easy; just follow my simple step-by-step guide and before you know it, you’ll be reaping the rewards of your newly propagated plant babies! So without further ado, let’s get started!
How To Propagate String Of Turtles?
Gather Materials
I’m getting ready to propagate my string of turtles, so I need to gather all the supplies. First, I’ll need a few containers to hold the cuttings. I recommend using a tray with drainage holes for this project as it will help keep soil from becoming too wet and promote healthy root growth.
You’ll also need a pair of scissors, potting mix, some peat moss or coco coir, and rooting hormone powder. I’m going to use a few 4-inch pots with drainage holes in the bottom. Then, I’ll use some soil mix and scissors to cut the stems. Finally, I’ll need a spray bottle to mist the cuttings as they root.
Prepare The Plant For Propagation
Now that you’ve gathered the necessary materials, it is time to prepare your peperomia prostrata for propagation. Propagating plants can be a rewarding experience and this particular species of turtle string is especially suitable for it. It’s an easy-going plant that doesn’t need much fussing over – perfect for even novice gardeners!
To propagate, begin by gathering clippings from healthy stems of your existing plant. Use sterile scissors or pruners to make sure no disease or insects are spread while taking cuttings.
Make sure each cutting has at least two sets of leaves attached; if there’s space on the stem, let one set grow longer as they will help feed the new root system as it develops. Dip the bottom end of each cutting in some rooting hormone powder before planting them in moist soil or water-filled containers.
This type of plant isn’t too picky when it comes to its environment so don’t stress if you don’t have ideal conditions; just keep things warm and humid and the cuttings should take off quickly!
Learn more: Vegetation management.
Choose A Suitable Growing Medium
When it comes to propagating string of turtles, it’s important to choose the right growing medium. The soil requirements should be light and well-draining, and a potting mix should contain perlite, sphagnum peat, and vermiculite.
I’d also recommend using peat-based potting soil for extra moisture and to help retain nutrients. Lastly, make sure the potting mix is slightly acidic to optimize the growth of your string of turtles.

Planting The Cuttings
To plant the cuttings, first, you need to select the right cuttings. Make sure they have at least three leaves and some rooted nodes. It’s best to take several cuttings from each plant as this will increase your chances of success. Then we can go ahead and plant them.
When planting, you’ll want to use a potting mix specifically formulated for succulents or cacti – this will ensure the perfect blend of drainage and aeration.
Make sure each cutting has enough room around it so they have space to grow without overcrowding one another. Make sure you have a well-drained soil mixture and keep them in a warm and bright spot. That’s all there is to it!
Maintaining Proper Humidity
I’m sure as a plant parent, you’re aware of just how important humidity is for your beloved string of turtles. These plants thrive in humid environments and, unfortunately, the air inside our homes can be quite dry. To keep your precious peperomia prostrata healthy, there are some things you should do!
First off, misting your plant often is an excellent way to increase its humidity levels. I suggest using distilled water or rainwater if possible – tap water may contain chemicals that could harm your delicate turtle strings!
You can also place it near other houseplants. Their collective transpiration will help elevate the moisture content in the air around them. Lastly, consider investing in a small humidifier. This device releases tiny droplets of water into the air which improves humidity instantly!
With these tips, you’ll have no trouble providing the perfect environment for your string of turtles to flourish.
Monitoring Temperature And Light
It is true that proper humidity levels are important for propagating string of turtles, but temperature and light also need to be monitored. Taking the time to understand how each factor affects your plants will help ensure they are getting just what they need in order to thrive.
Temperature plays a vital role in propagating string of turtles; it should stay within 65°F-75°F (18°C-24°C) during the day and 10° cooler at night for optimal growth. Too cold or too hot temperatures can cause serious damage to the plant’s health.
Bright indirect sunlight or fluorescent lighting is best when providing adequate light for these plants as direct sunlight can scorch their leaves. You’ll want to adjust them away from any sources of drafts such as heating vents, open windows, or air conditioners.
With warm temperatures, bright filtered light, and plenty of humidity you’ll have healthier-looking plants in no time!
See more: Dwarf water lettuce vs frogbit.
Watering The Cuttings
Watering the cuttings can be tricky but with a few simple steps, you’ll soon have them thriving.
Start by preparing your potting mix – it should include some organic matter such as peat moss or coco coir combined with perlite for good drainage. Make sure to moisten it thoroughly before adding the cuttings so they don’t dry out too quickly.
Next, place the stems into the soil at an angle, making sure that only two leaves are above ground while leaving enough room between them for air circulation. Finally, keep the soil damp but not soggy, misting every couple of days if needed.
Transplanting The Cuttings
Right, so now that we’ve finished watering our cuttings let’s move on to transplanting them! Now you’ll need a pot or hanging basket with some good-quality soil in it. Make sure the pot is big enough for your cutting – if you have more than one cutting, don’t cram them into one tiny container because they won’t be able to grow properly.
Once you’ve put the soil in and made a hole big enough for your cutting(s), gently place each one in its own space and fill up the excess area around it with soil. Give them a little pat down just to make sure everything is secure.
You don’t want any of those string of turtles falling out when you water ’em later! That’d be disastrous! So there ya go: your babies are all set up and ready to start growing strong roots.
Troubleshooting Common Issues While Propagating String Of Turtles
When propagating Peperomia prostrata, many people come across common issues that can be problematic. From inadequate light and water requirements to pests, disease, and lack of oxygen supply, there are a number of potential problems you should look out for.
I’ll tell you the best ways to troubleshoot these issues so your string of turtles will remain healthy and happy!
First off, make sure the plant is getting enough sunlight throughout the day in order to promote growth. If not, move it closer to a window or add additional lighting fixtures.
Next up, check if your soil has adequate drainage by poking around with a finger – if water remains at the surface too long then this could cause root rot. If necessary amend the soil mix with perlite or sand to increase overall airflow (which helps eliminate mold).
Pay attention to signs of pest infestation such as brown spots on leaves – treat accordingly if needed.
Also, ensure you’re watering properly; don’t overwater but also don’t let them dry out completely either!
How To Propagate String Of Turtles In Soil?
To Propagate a string of turtles in soil, you need to find the right kind of soil: one that’s well-draining but moisture retentive.
Peat moss can work wonders if mixed into your potting mix to give it more body. Then fill up your pots halfway before adding water until they’re fully moistened – this will give you an idea of how much water your soil retains.
Once the soil has been prepped, place several small cuttings around 1 inch long onto the surface and lightly press them down so they stay put. Make sure there are no large air gaps between the cuttings and the soil; otherwise, the roots won’t be able to form properly.
Mist over the top of each cutting every few days or when you notice any wilting from lack of water. With patience and care, new growth should start emerging within weeks and eventually create a full cascading effect!
How To Propagate String Of Turtles In Water?
Propagating string of turtles in water can be done in two easy steps:
- Gathering A Cutting For Propagation
- Preparing The Cutting
Gathering A Cutting
Gathering a cutting from your string of turtles is the easiest way to propagate them! To get started, you’ll need scissors or pruners and a glass jar with some water – it’s that simple.
I like to take cuttings just above where two leaves come out of the main stem; this will ensure they don’t become too top-heavy in the water. After snipping off the cutting, drop it right into your jar and watch as roots begin to form within a few weeks!
As long as you keep your jar topped up with fresh water, your new plant should thrive. Now all you have to do is wait for it to grow big enough before you can transfer it into the soil.
Preparing The Cutting
Once you’ve got your cutting ready, it’s time to prepare it for propagating! I like to trim off any brown edges or lower leaves from the stem, as these will rot in water and encourage disease.
Then, just give the stem a nice clean cut – this should be done at an angle so that more of the surface area is exposed, allowing it to absorb moisture better. This way, your string of turtles can get everything they need to take root quickly and easily.
Don’t forget to add some rooting hormone if you have some on hand – this provides essential nutrients and minerals which help create strong roots faster.
How To Propagate String Of Turtles In Sphagnum Moss?
Propagating string of turtles(Peperomia prostrata) in sphagnum moss is a powerful way to increase their growth and create an absolutely stunning display! With just a few simple tips, you can be on your way to creating the envy of all your friends.
The process is fairly straightforward – simply take some healthy cuttings from the plant, trim them down to size, then submerge them into moistened sphagnum moss while ensuring they don’t rot away.
Once planted, it’s time for patience as these lush green plants need plenty of indirect light and regular misting with water so that they thrive.
In no time at all you will have created something truly magical; vibrant strings of turtle leaves dancing across your windowsill or shelves like a beautiful living tapestry.
How To Propagate String Of Turtles Cutting?
When propagating string of turtles cuttings, the most important things to consider are the soil choice, watering, and the use of rooting hormone.
Soil Choice
The choice of soil is an important factor to consider. The best type of soil for these plants is a light and airy mix that drains quickly yet retains moisture well – something like a coco-coir-based potting mix with perlite added in for extra drainage works great.
Make sure you’re not using regular garden soil or anything heavy/clayey as it will lead to root rot over time. I also like to add some slow-release fertilizer into my mixes so the cuttings get off to a good start when they’re planted up.
Watering
Once you’ve got your soil all sorted, it’s time to talk about watering. As with most cuttings propagation techniques, consistency is key when it comes to keeping the humidity high and the plant hydrated.
I like to mist my plants daily and give them a good soak once every week or two – this helps ensure that they stay moist without getting soggy roots.
You also want to avoid letting them completely dry out as this can damage new growth, so keep an eye on their moisture levels if possible. Just remember: water sparingly but consistently for a happy string of turtles!
Rooting Hormone
Now that we’ve got the watering part of propagation down, let’s talk about the rooting hormone! A good quality rooting hormone can help encourage new root formation on your cuttings and give them a better chance at surviving.
I like to dip mine in a mixture of water and powder before transferring it over to soil – this way they get an extra boost of nutrients as well. Just make sure you don’t go too heavy-handed with the stuff because then it could actually impede growth.
So if you’re going for maximum success rates when propagating string of turtles, don’t forget the rooting hormone – it really does make a difference!
How To Propagate String Of Turtles In A Plastic Bag?
Obtaining Plant Cuttings
It’s easy to obtain plant cuttings for propagating String of Turtles (Peperomia prostrata) in a plastic bag! All you need is some scissors or shears and a healthy Peperomia prostrata.
Cut off the top 5 cm of the stem with two leaves attached, remove any lower leaves, then place your cutting into a moist sphagnum moss-filled bag.
Planting Cuttings
Once you’ve got your cutting all ready, it’s time to get planting! Place the bag with the cutting inside a shallow bowl of water and let soak for 10 minutes. Once finished, take out the cutting from the bag and loosen up any tightly packed moss around the stem before planting into a potting mix that is half peat moss and half perlite.
Make sure to keep the soil moist but not soaked – just enough so that it doesn’t dry out quickly. Remember: don’t place them in direct sunlight as this will cause the leaves to wilt or burn. Growing succulents can be tricky, but if done correctly, you’ll have an abundance of these gorgeous trailing houseplants in no time!
How To Propagate String Of Turtles Leaves?
In this section, I’m going to show you how to propagate string of turtles(Peperomia prostrata) leaves so that you can have a beautiful display in your home. It’s actually quite simple and doesn’t require any special tools or knowledge!
First off, take some healthy-looking leaves from the plant and put them in a shallow container filled with water. Make sure the leaves are completely submerged. Place the container somewhere warm and well-lit, but out of direct sunlight.
After about two weeks, new roots should appear on the bottom of each leaf – this is when they’re ready for potting up into soil! Once potted up, keep the soil moist until the plants have established themselves in their new homes.
That’s it – you now know how to propagate string of turtles (Peperomia prostrata) leaves! Have fun creating unique displays with these beautiful little houseplants!
Conclusion
Propagating string of turtles is not as difficult as it sounds. With a little patience, knowledge, and the right materials, you can be successful in propagating this beautiful plant. Whether you decide to go with cuttings or leaves, creating your own lush jungle is possible with just a few simple steps.
As I always say, “A journey of a thousand miles starts with one step”! So don’t be afraid to take that first step towards achieving success in propagating string of turtles. After all, nothing ventured, nothing gained—so why not give it a try?


